Before we begin a lesson that is of a level higher than being a mere beginner, go through the previous lesson once again, if you are not feeling confident enough to move on or if you are new here.
http://www.bangalorewishesh.com/home/hot-buzz/33425-camera-wishesh-better-exposure.html
If you are reading this line, I will assume that you are fairly conversant with our previous lessons so a few technical terms wouldn't hurt.
To take a good picture, you should understand light, after all a photograph is the recorded light. But, does your camera see light as you do? You can only wish that your camera can see as well as your eye does. The cameras are far behind the technology embedded in your body, but you can still bring out true to life pictures and even some surreal shots if you know how to exploit the camera's weaknesses. Understand light!
How your camera sees light: Metering
Metering: This is a term used to determine how the camera understands the light, according to your choice.
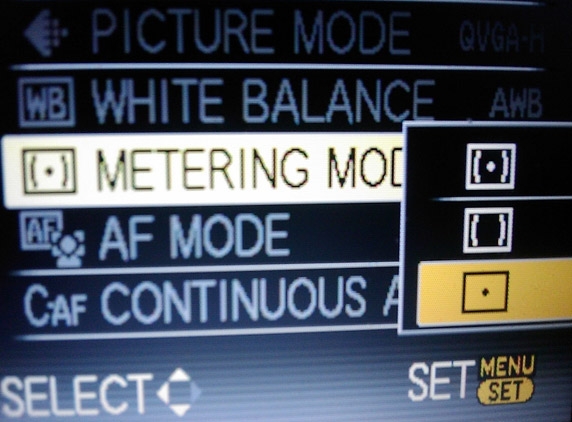
There are different metering modes that will help you get better pictures in specific situations. In most cameras the metering modes are
1. Spot Metering
2. Partial Metering/ Center- Weighted
3. Matrix/ Evaluative
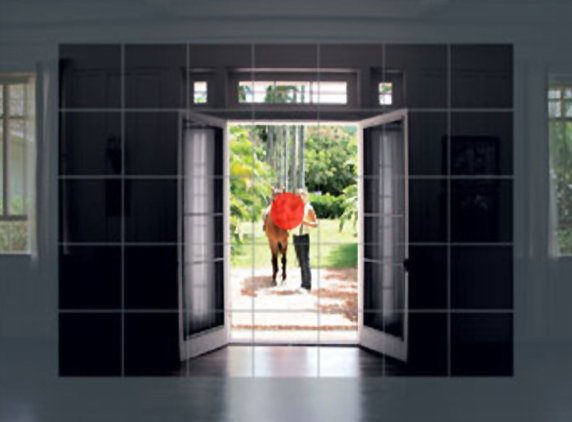
Spot Metering: The camera determines the lighting in the dead center considering only 1-5% of the area to judge the scene. Several cameras today allow you to select the reference point from where the light can be determined but the area of consideration is still the same.

This image is the perfect example to understand the metering mode. At one glance you can see nothing but the subject and slight subtle details from the back ground closer to the center. The focus point is on the blue earthenware. Camera understands that this is the amount of light in the whole picture and snaps a shot with the same idea. Exposure is selected based on the amount of light at the subject. But the lighting is not even. Farther from the center, the lighting is gradually decreasing. Had it been the evaluative metering mode, the light from a large area of the picture might have been noted and an average would have been delivered making the background much brighter than this desired shot.
Partial Metering/ Center Weighted Metering: This is just the same as the Spot Metering mode only that the area covered by the point of reference is higher up to 15%. This is more meaningful in many shots since your subject's generally take at least 15% of the shots. However, it depends on the source of light and what kind of effect you want to achieve when you take a picture.

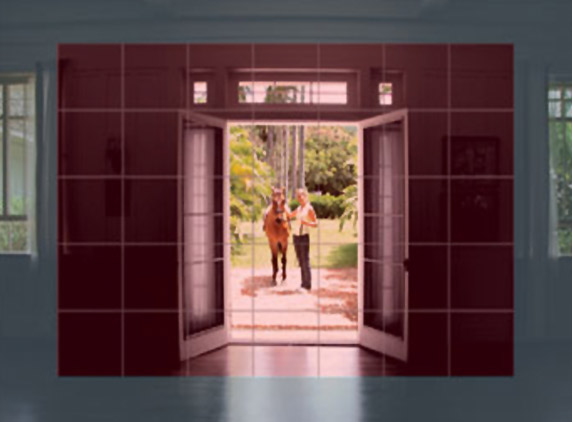
Evaluative/ Matrix: This is the factory standard default setting for your camera. The light from the center covering an area of 60-70% of light is averaged and calculated to suit the picture best. In shots where the subject occupies a large portion of the frame or if you need to consider light from all the scene, you will have to choose this mode. This is the easiest mode to shoot for beginners. A pleasant picture is the general result with this mode but you have very little control over the exposure compensation.

Spot and Partial Metering require great understanding to be put to use. Initially it will take you time to figure out how the modes work. As a basic rule of thumb follow the following until you get a grip of the modes.
Use Spot and Partial metering only when
Subject is a small part of your frame,
Back-lit subjects, unless you are looking for a silhouette
In scenes where lighting is unevenly bright in certain areas
Photography tip of the day: Organize your photographs with proper names. Folder name should be Name of the place/event, month/year. Photo names can be subject/date/month/year. This will make your photos easier to browse through though it is painful to organize.
(AW- Anil)


